
If you love DIY projects, you know how key it is to keep your Hampton Bay ceiling fan in top shape. A faulty capacitor can really mess things up. In this guide, I’ll show you how to swap out your capacitor with a top-notch HQRP one. This will make sure your fan works perfectly.

Key Takeaways
- Understand the function and types of capacitors used in Hampton Bay fans
- Identify signs of capacitor failure and its impact on fan performance
- Gather the essential tools and materials needed for a successful HQRP capacitor replacement
- Follow proper safety precautions and wiring diagrams during the replacement process
- Ensure a seamless installation and proper connections for your new HQRP capacitor
Understanding Ceiling Fan Capacitors and Their Function
Capacitors are key to how ceiling fans work. If you own a Hampton Bay ceiling fan, knowing about these parts is important. It helps with upkeep and fixing problems. Let’s look at ceiling fan capacitors and the types used in Hampton Bay fans.
Types of Capacitors Used in Hampton Bay Fans
Hampton Bay fans use two main types of capacitors. Run capacitors control the fan’s speed and performance. Start capacitors give the fan the power it needs to start moving.
The type of capacitor in your Hampton Bay fan depends on the model and its age. You might find a black capacitor in older models or newer designs.
Signs of Capacitor Failure
Knowing when a capacitor might fail is key to keeping your fan running well. Look out for these signs:
- Decreased fan speed or erratic operation
- Unusual noises or vibrations coming from the fan
- Inconsistent or reduced airflow
- Difficulty starting the fan or the motor cutting out during operation
How Capacitors Affect Fan Performance
Capacitors are crucial for your Hampton Bay fan’s performance. A good capacitor means the fan works smoothly and efficiently. But, a bad capacitor can cause problems like slower speeds or even motor failure.
It’s important to understand capacitors and their role in your fan’s performance. Knowing the signs of failure and how they affect your fan helps you fix any issues.
Essential Tools and Materials for HQRP Capacitor Replacement
When you’re ready to replace your Hampton Bay ceiling fan’s capacitor with an HQRP one, having the right tools is key. The right items will make your DIY fan repair easy and quick. Let’s look at what you’ll need for this job.
- Screwdrivers (both flathead and Phillips head) for disassembling the fan housing
- Needle-nose pliers to grasp and remove the old capacitor
- Wire strippers to expose the wires for proper connections
- Electrical tape to secure new wiring connections
- Heat-shrink tubing or wire nuts to insulate wire splices
- HQRP capacitor replacement that matches your fan’s specifications
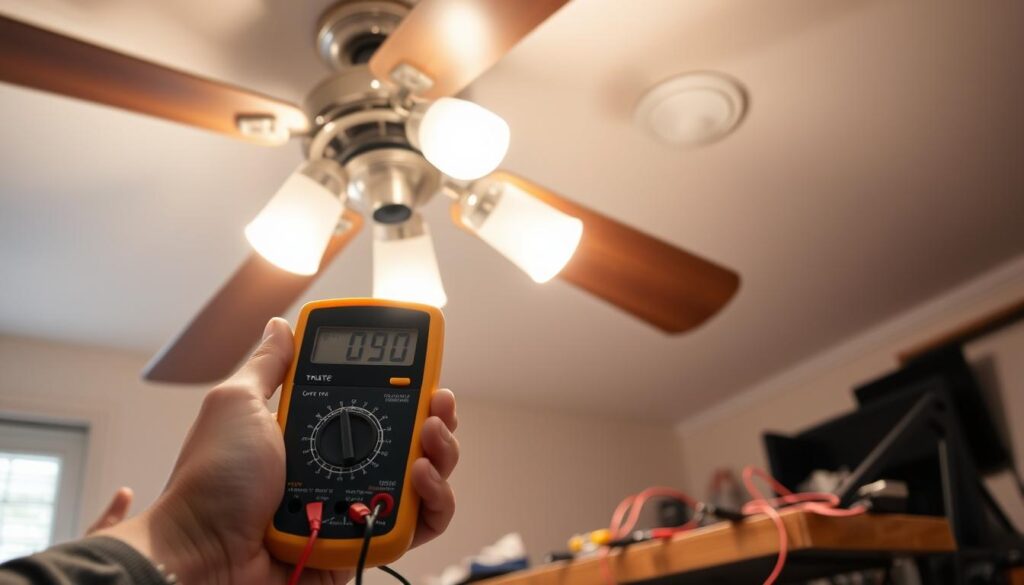
- Multimeter to test the new capacitor and verify fan functionality
- Ladder or step stool to safely access the ceiling fan
Having these HQRP capacitor, replacement tools, and DIY fan repair essentials ready will make replacing your capacitor easy. Always keep safety first and follow the manufacturer’s instructions for the best results.
| Tool or Material | Purpose |
|---|---|
| Screwdrivers | Disassemble the fan housing |
| Needle-nose pliers | Remove the old capacitor |
| Wire strippers | Expose wires for proper connections |
| Electrical tape | Secure new wiring connections |
| Heat-shrink tubing/wire nuts | Insulate wire splices |
| HQRP capacitor | Replace the old component |
| Multimeter | Test the new capacitor and fan |
| Ladder/step stool | Safely access the ceiling fan |
With these essential tools and materials, you’re set to replace your Hampton Bay ceiling fan’s capacitor. This will ensure a successful DIY repair and keep your fan working well.
Safety Precautions Before Starting the Replacement
Working with electrical parts means safety first. Before you start to replace the ceiling fan capacitor, make sure you’re ready for a safe and successful job.
Power Disconnection Protocol
First, turn off the power to your ceiling fan. You can do this by switching off the circuit breaker or unplugging the fan. Check if the power is off by trying to turn on the fan. If it doesn’t work, you’ve done it right.
Workspace Preparation Guidelines
- Clear the area around the ceiling fan, ensuring that there are no obstructions or trip hazards.
- Ensure that the workspace is well-lit and free from moisture or water sources.
- Wear protective gear, such as safety glasses and gloves, to safeguard your eyes and hands from any potential hazards.
- Have a step stool or ladder nearby to reach the ceiling fan safely.
By following these ceiling fan safety and electrical safety steps, you can avoid accidents. This makes the capacitor replacement process easier and safer.
| Safety Precaution | Importance |
|---|---|
| Power Disconnection | Prevents risk of electric shock |
| Workspace Preparation | Reduces the likelihood of accidents or injuries |
| Protective Gear | Safeguards eyes and hands from potential hazards |
| Proper Ladder or Stool | Ensures safe access to the ceiling fan |
Accessing Your Hampton Bay Fan’s Capacitor Housing
Finding and opening the capacitor housing in your Hampton Bay ceiling fan is key to replacing it. This guide will show you how to safely and efficiently get inside the fan.
To start, you need to take apart the Hampton Bay fan. First, switch off the power to the fan at the circuit breaker. Next, remove the fan blades, light kit (if there is one), and any other parts you can take off. This will let you see the fan’s inside.
- Find the fan’s motor housing. This is usually the middle part of the fan where the motor is.
- Look at the motor housing for any panels or covers you can remove. These are often held by screws or clips.
- After removing the access panel, you should see the capacitor housing. The capacitor is important for the fan’s motor to start and run well.
If finding the capacitor housing is hard, check your Hampton Bay fan’s manual or online for help. The capacitor’s spot can change based on the fan’s design and age.
Now that you’ve found the capacitor housing, you’re set to replace the capacitor. Remember to stay careful and make sure the power is off to keep safe.
Hampton Bay Ceiling Fan Capacitor Replacement Process
Replacing the capacitor in your Hampton Bay ceiling fan is easy and can fix performance issues. Whether it’s a HQRP capacitor or a general repair, knowing how to replace it is key. Let’s go through the steps for a smooth swap.
Removing the Old Capacitor
First, find the capacitor housing in your Hampton Bay fan. It’s usually at the top of the motor assembly. Carefully disconnect the wiring from the old capacitor, noting where they go for later.
Once the wires are off, you can remove the capacitor. It’s mounted, so be gentle.
Installing the New HQRP Component
Now, put in the new HQRP capacitor. Make sure it fits right where the old one was. Connect the wires to their correct spots, ensuring they’re snug.
Verifying Proper Connections
After installing, check all wiring connections. Make sure they’re tight and in the right place. This prevents problems with your fan.
Also, make sure the new capacitor is secure and doesn’t move. By following these steps, you can fix your Hampton Bay ceiling fan. Always be careful and follow the manufacturer’s guide if unsure.
Understanding Hampton Bay Ceiling Fan Wiring Diagrams
If you love DIY projects, knowing how to read a Hampton Bay ceiling fan wiring diagram is key. These diagrams help you navigate the complex electrical connections that make your fan work. They are essential when you need to replace the capacitor.
Hampton Bay ceiling fans use a black capacitor to control speed and performance. Knowing your wiring diagram ensures a smooth capacitor replacement. This avoids any mistakes that could harm your fan’s operation.
The diagram shows connections between the fan’s motor, capacitor, and power source. It’s crucial to note the black capacitor’s position and the wire colors. These details are vital for the electrical connections.
Grasping the Hampton Bay ceiling fan wiring diagram with black capacitor and electrical connections helps you fix problems. It also boosts your confidence in replacing the capacitor.

By carefully following the wiring diagram, you can install your new HQRP capacitor correctly. This ensures your Hampton Bay ceiling fan works at its best. Understanding the wiring diagram is crucial for a successful replacement and beyond.
Matching HQRP Capacitor Specifications
When you replace the capacitor in your Hampton Bay ceiling fan, make sure the new one fits right. This ensures your fan works well without any problems.
Reading Capacitor Values
First, look at the values on your current capacitor. Ceiling fan capacitors have three important specs: capacitance, voltage rating, and wire count. Take note of these to find the right HQRP replacement.
Compatibility Considerations
It’s not just about matching values. The new capacitor must also fit physically and meet mounting needs. Check that it fits well in the housing and matches your fan’s wiring.
| Specification | Your Current Capacitor | HQRP Replacement Capacitor |
|---|---|---|
| Capacitance (μF) | 5 | 5 |
| Voltage Rating (V) | 370 | 370 |
| Number of Wires/Terminals | 3 | 3 |
| Dimensions (L x W x H) | 1.5 x 1 x 2.5 inches | 1.5 x 1 x 2.5 inches |
Matching the HQRP capacitor specs to your fan’s needs is key. This ensures a smooth replacement and keeps your fan running great.
Common Mistakes to Avoid During Installation
When you’re doing DIY fan repair, especially capacitor replacement, it’s key to avoid common mistakes. I’ve seen many DIY fan repair errors that can cost a lot. Here, I’ll share tips to help you avoid these mistakes and do a successful capacitor installation.
- Ignoring Safety Precautions: Not turning off the power or working in a clean, well-lit area can be dangerous. Always put safety first when fixing a DIY fan repair project.
- Purchasing the Wrong Capacitor: Choosing a capacitor that doesn’t fit your Hampton Bay ceiling fan can cause problems. Make sure to check the manufacturer’s advice and capacitor installation tips for the right match.
- Incorrect Wiring Connections: Wrong wiring during capacitor replacement can make the fan not work right or even be unsafe. Always check the wiring diagram and double-check your connections to avoid this mistake.
- Overlooking Proper Mounting: Not mounting the new capacitor right can make it loose. This can cause the fan to work poorly or damage the part. Make sure the capacitor is securely in place before finishing the job.
Remember these common DIY fan repair errors and use the capacitor installation tips from this guide. With these tips, you can confidently replace your Hampton Bay ceiling fan capacitor and have a working fan for a long time.
Testing Your Fan After Capacitor Replacement
Congratulations on replacing your Hampton Bay ceiling fan’s capacitor with a new HQRP one! Now, it’s time to make sure your fan works perfectly. We’ll show you how to test your fan, check speed settings, and fix any issues after the repair.
Speed Settings Verification
After installing the new capacitor, turn on your ceiling fan. Check if it can reach all its speed settings. Make sure it works from slowest to fastest. If it doesn’t work right, fix it quickly.
Troubleshooting Post-Installation Issues
After replacing the capacitor, you might face some common problems. These include:
- Unusual noise or vibration
- Intermittent or erratic fan operation
- Failure to reach desired speed settings
- Insufficient airflow or cooling
If you see any of these issues, check the wiring and make sure the capacitor fits right. Also, double-check it matches your Hampton Bay fan model. If you need help, look at the wiring diagrams or contact the manufacturer.
By carefully testing your ceiling fan after the repair, you’ll know it’s working well. Fixing any issues quickly keeps your fan reliable and efficient for a long time.
Maintaining Your New HQRP Capacitor
Keeping your Hampton Bay ceiling fan in top shape is key. By following a few easy steps, you can make sure your HQRP component lasts long. This way, you’ll enjoy your fan’s smooth operation for many years.
Regular checks are vital for your HQRP capacitor. Every 6-12 months, look for any wear signs like cracks, leaks, or color changes. Catching these early can prevent fan problems.
Also, make sure the connections are tight. Vibrations can loosen wiring over time. So, it’s smart to check and tighten connections now and then.
- Visually inspect the HQRP capacitor for signs of wear, such as cracks, leaks, or discoloration.
- Check that all connections are tight and secure, tightening any loose screws or terminals.
- Avoid exposing the capacitor to excessive heat, moisture, or physical stress, which can accelerate its deterioration.
- Consider replacing the HQRP component every 5-7 years as a preventive measure, even if it’s still functioning properly.
By sticking to these capacitor maintenance tips, your Hampton Bay ceiling fan will keep running well. Enjoy its smooth operation for years.
Cost Comparison: DIY vs Professional Replacement
Replacing a capacitor in your Hampton Bay ceiling fan can be done two ways: DIY or by a professional. Your choice depends on your budget and DIY skills. Let’s look at the costs for each option.
DIY Ceiling Fan Capacitor Replacement
Doing it yourself can save money but takes time and effort. Costs include:
- HQRP Replacement Capacitor: Costs $5 to $15 based on the capacitor type.
- Tools and Supplies: You might spend $10 to $20 on tools like screwdrivers and electrical tape.
The total DIY cost is $15 to $35, depending on your fan model’s needs.
Professional Ceiling Fan Capacitor Replacement
Getting a professional to do it is more convenient but costs more. Costs include:
- Labor Fees: Expect to pay $50 to $150, based on the electrician’s rate and job complexity.
- Replacement Capacitor: Costs $5 to $15, just like DIY.
The total cost for a professional job is $55 to $165, making it pricier than DIY.
Factors to Consider
When choosing between DIY and professional replacement, think about these points:
- Skill Level: If you’re good with electrical stuff and can follow instructions, DIY might work. But if you’re unsure, a pro is safer and more reliable.
- Time Investment: DIY takes a few hours, while pros do it faster.
- Warranty and Liability: Pros usually offer a warranty and are insured, which reduces DIY risks.
Your choice between ceiling fan repair costs for DIY or professional depends on your budget, DIY confidence, and safety concerns.
Conclusion
In this guide, we’ve looked at how to replace the capacitor in your Hampton Bay ceiling fan with the HQRP component. We’ve seen how capacitors are key to fan performance and how to spot when they fail. Now, you’re ready to do this DIY project easily.
The HQRP capacitor brings many benefits. It improves fan speed control, boosts energy efficiency, and extends motor life. Choosing a high-quality replacement means your fan will work great for many years.
With the right tools, safety steps, and a clear guide, you can replace the capacitor. This will make your Hampton Bay ceiling fan work smoothly again. Remember, understanding wiring diagrams and making sure connections are right is crucial. Avoiding mistakes will let you enjoy your work for a long time.
FAQ
What types of capacitors are used in Hampton Bay ceiling fans?
Hampton Bay ceiling fans use run capacitors. These capacitors help start and keep the fan’s motor running. The size and type of capacitor vary by fan model.
How do I know if my ceiling fan’s capacitor needs to be replaced?
Look out for signs like erratic fan speed or the fan not starting. These are signs the capacitor might need replacing.
What tools and materials do I need to replace the capacitor in my Hampton Bay ceiling fan?
You’ll need a new HQRP capacitor, a flat-head screwdriver, wire strippers, and electrical tape. A step stool or ladder is also helpful for reaching the fan’s interior.
How do I safely disconnect power to my Hampton Bay ceiling fan before starting the replacement process?
Turn off the circuit breaker or unplug the fan first. Make sure the power is off before you start.
Where is the capacitor located in my Hampton Bay ceiling fan?
The capacitor is in a small box near the fan’s motor, usually at the top. You might need to remove the fan’s cover to get to it.
How do I properly remove the old capacitor and install the new HQRP component?
First, disconnect the wires from the old capacitor. Then, remove it and put in the new HQRP capacitor. Make sure to reconnect the wires correctly.
How can I interpret the wiring diagram for my Hampton Bay ceiling fan?
The wiring diagram for your fan model shows the electrical connections. It’s important for installing the new capacitor correctly.
How do I ensure the HQRP capacitor I’m using is compatible with my Hampton Bay ceiling fan?
Check the voltage and microfarad (μF) rating of the new capacitor. It should match the original one in your fan for a proper fit.
What are some common mistakes to avoid when replacing the capacitor in my Hampton Bay ceiling fan?
Avoid wrong wiring, not turning off power, and using the wrong capacitor. Take your time and double-check your work to avoid mistakes.
How do I test my Hampton Bay ceiling fan after installing the new HQRP capacitor?
Turn the power back on and check the fan’s speed settings. If there are issues, see the troubleshooting section for help.
How can I maintain the new HQRP capacitor in my Hampton Bay ceiling fan?
Regularly check the capacitor for wear or damage. Clean the fan’s interior to keep it running well. Fixing problems quickly helps the capacitor last longer.