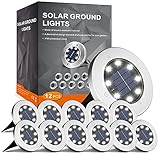
Hampton Bay solar pathway lights are an eco-friendly and stylish solution for illuminating outdoor spaces. Powered by renewable solar energy, these lights provide an elegant way to enhance the beauty and safety of pathways, gardens, and driveways. With a range of designs to complement any outdoor decor, Hampton Bay solar lights offer a perfect blend of functionality and aesthetics. Hampton Bay solar pathway lights come in a variety of designs, from modern LED styles to vintage-inspired fixtures with filament bulbs, combining energy efficiency with timeless charm.
In this guide, we’ll explore everything you need to know about Hampton Bay solar pathway lights, including installation tips, maintenance practices to ensure long-term performance, troubleshooting common issues, and finding replacement parts to keep your lights shining brightly for years to come.
Why Choose Hampton Bay Solar Pathway Lights?
Solar pathway lights from Hampton Bay provide numerous advantages, making them an excellent choice for outdoor lighting:
- Eco-Friendly: Harnessing the power of the sun, these lights reduce energy consumption and lower your carbon footprint.
- Cost-Effective: Since they don’t rely on electricity, solar lights save on utility bills while providing consistent illumination.
- Aesthetic Appeal: With a variety of stylish designs, these lights add charm and sophistication to outdoor spaces.
- Enhanced Safety: Brightening walkways, driveways, and garden paths improves visibility, reducing the risk of trips and falls during the evening.
What This Guide Covers
This comprehensive guide will focus on:
- Installation Tips: Learn how to set up Hampton Bay solar pathway lights for optimal performance and placement.
- Maintenance Practices: Discover how to clean and care for your solar lights to maximize their lifespan and efficiency.
- Troubleshooting Common Issues: Address problems like dim or non-functioning lights with practical solutions.
- Replacement Parts: Find out where to purchase authentic replacement components, such as solar panels, batteries, and LED bulbs, to keep your lights in top condition.
By understanding the unique features and maintenance needs of Hampton Bay solar pathway lights, you can enjoy beautifully illuminated outdoor spaces while making a positive impact on the environment. Dive into the details to enhance your outdoor experience with these efficient and elegant lighting solutions!
Understanding Hampton Bay Solar Pathway Lights
Hampton Bay solar pathway lights offer an eco-friendly, low-maintenance solution for outdoor lighting. These lights harness the power of the sun to illuminate pathways, gardens, and driveways, combining style and functionality. By understanding the types of solar lights available and their innovative functionality, you can make the most of these sustainable lighting options.
Types of Hampton Bay Solar Lights
Hampton Bay provides a diverse range of solar lighting options, ensuring a solution for every outdoor need. For those seeking a nostalgic look, some Hampton Bay models feature filament-style LED bulbs that mimic the warm glow of traditional lighting while operating on low voltage solar power, ensuring energy efficiency.
Here are the key types:
1. LED Solar Pathway Lights
- Description: These are the most common type of solar lights, designed to stake directly into the ground.
- Uses: Ideal for illuminating walkways, garden paths, and driveways with a soft, ambient glow.
- Features: Equipped with built-in solar panels and energy-efficient LED bulbs, these lights operate automatically from dusk to dawn.
2. Solar Spotlights
- Description: Bright, directional lights that highlight specific outdoor features.
- Uses: Perfect for emphasizing trees, statues, or architectural details.
- Features: Adjustable angles and high-intensity LEDs for focused illumination.
3. Solar String Lights
- Description: Decorative lights in various forms, such as lanterns or globes, connected by a string.
- Uses: Enhance patios, decks, and gardens with a warm, festive ambiance.
- Features: Powered by a single solar panel, these lights add charm to outdoor gatherings.
4. Solar Flood Lights
- Description: Powerful lights designed to cover wide areas with bright illumination.
- Uses: Excellent for enhancing security around garages, driveways, or large gardens.
- Features: Provide a strong, consistent beam of light for high-visibility areas.
5. Solar Step Lights
- Description: Compact lights specifically designed to enhance nighttime visibility on steps and stairs.
- Uses: Improves safety by illuminating stairways, reducing the risk of trips and falls.
- Features: Durable and weather-resistant, these lights are ideal for high-traffic areas.
How Hampton Bay Solar Pathway Lights Work
Hampton Bay solar pathway lights operate using an efficient system that converts sunlight into energy, making them both eco-friendly and convenient.
1. Solar Energy Conversion
- Solar Panel Absorption: Solar panels on the lights absorb sunlight throughout the day.
- Electricity Generation: The sunlight is converted into electrical energy by the photovoltaic cells in the solar panel.
- Battery Storage: The energy is stored in a rechargeable battery for use at night.
2. Automatic Activation
- Light Sensors: Built-in sensors detect the onset of darkness, automatically turning the lights on.
- Illumination: The stored energy powers the LEDs, providing bright and reliable lighting throughout the night.
Benefits of Hampton Bay Solar Pathway Lights
Hampton Bay solar pathway lights are packed with advantages that make them a top choice for outdoor lighting:
- Energy Efficiency:
- Completely powered by the sun, reducing electricity costs.
- No carbon emissions, promoting environmental sustainability.
- Ease of Installation:
- No wiring required; simply stake the lights into the ground or position them as needed.
- Low Maintenance:
- Durable designs and rechargeable batteries require minimal upkeep.
- Versatile Design Options:
- Available in various styles to suit aesthetic and functional needs.


Tools and Materials Needed for Installing Hampton Bay Solar Pathway Lights
Proper installation and maintenance of Hampton Bay solar pathway lights require the right tools, safety equipment, and materials. Preparing these items in advance ensures a smooth and efficient setup process while extending the longevity of your solar lights.
Basic Tools for Installation
Having the appropriate tools on hand is essential for a hassle-free installation. Here’s what you’ll need:
- Shovel or Trowel:
- Use to dig small holes in the ground for securely placing the lights.
- Ideal for pathways, gardens, or uneven terrain.
- Screwdriver (Phillips/Flathead):
- Needed to open the battery compartment for replacing or checking rechargeable batteries.
- Useful for securing any screws on certain models.
Safety Equipment
Safety should always be a priority during installation. Use the following protective gear to prevent injuries:
- Gloves:
- Protect hands from sharp objects, dirt, or splinters during installation.
- Provide a better grip when handling tools or lights.
Materials for Installation and Maintenance
In addition to tools, these materials are necessary for both setting up and maintaining your solar pathway lights:
- Rechargeable Batteries:
- Commonly AA or AAA types, used to store solar energy.
- Ensure compatibility with your specific Hampton Bay model.
- Optional Materials:
- Mulch or Gravel: Create a clean and level base around the light for added stability and aesthetics.
- Outdoor Mounting Tape: For secure installation on hard surfaces where staking isn’t an option.
Additional Tips for Installation
- Read the Manual:
- Always follow the manufacturer’s instructions for assembly and installation.
- Test the Lights:
- Place the lights in direct sunlight for a full charge before installation to confirm functionality.
- Choose the Right Location:
- Ensure the selected area receives at least 6 hours of direct sunlight daily for optimal performance.
Installation Process for Hampton Bay Solar Pathway Lights
Proper installation of Hampton Bay solar pathway lights ensures optimal performance and enhances the aesthetics of your outdoor space. Follow these steps to prepare for and execute a seamless installation.
Preparing for Installation
1. Choose a Suitable Location
Selecting the right location is critical for the effective performance of solar pathway lights.
- Sunlight Availability:
- Ensure the spot receives at least 6+ hours of direct sunlight daily for efficient charging of the solar panels.
- Avoid shaded areas caused by trees, walls, or other obstructions.
- Spacing:
- Place lights approximately 6–8 feet apart to achieve even illumination along the pathway or garden area.
- Adjust spacing as needed for decorative or functional purposes.
2. Gather Necessary Tools and Materials
Before starting, make sure you have everything you need for a smooth installation:
- Tools:
- Shovel or Trowel: For digging small holes to anchor the lights securely into the ground.
- Screwdriver: Use if the battery compartment needs to be opened for setup or maintenance.
- Gloves (Optional): Protect your hands from dirt or rough surfaces during installation.
- Materials:
- Rechargeable Batteries: Verify that the lights come with compatible batteries or have replacements ready.
- Optional Materials: Use mulch or gravel to level the area around the light bases for added stability and a polished look.
Step-by-Step Installation of Hampton Bay Solar Pathway Lights
Installing Hampton Bay solar pathway lights is a straightforward process that enhances your outdoor space with eco-friendly lighting. Follow these detailed steps to ensure your lights are properly assembled, securely installed, and optimally positioned for maximum performance.
1. Assemble the Lights
Before installation, ensure that your Hampton Bay solar pathway lights are properly assembled:
- Attach the Stake:
- Align the stake with the base of the light fixture and securely attach it as per the manufacturer’s instructions.
- Activate the Lights:
- Locate the activation mechanism, such as a pull tab or on/off switch.
- Remove the tab or turn the switch to the “on” position to enable the solar charging and lighting functionality.
2. Install the Stakes
Secure placement of the stakes is essential for stability and proper illumination.
- Prepare the Ground:
- Use a shovel or trowel to dig small holes where each light will be placed.
- Ensure the ground is level and free from large rocks or obstructions.
- Insert the Stake:
- Push the stake firmly into the ground, ensuring it’s straight and stable.
- Avoid Hammering: Use your hands or apply light pressure to avoid damaging the stake or the light fixture.
3. Position the Lights
Positioning your solar pathway lights correctly maximizes their effectiveness.
- Angle the Solar Panel:
- Tilt or adjust the solar panel (if applicable) to face south or the sunniest direction for optimal exposure to sunlight.
- Face the Light Appropriately:
- Position the lights so they effectively illuminate pathways, garden beds, or driveways without being obstructed by objects like shrubs or fences.
4. Test Functionality
Ensure your solar pathway lights operate correctly after installation.
- Charge the Lights:
- Allow the lights to charge in direct sunlight for a full day before testing their functionality.
- Check for Operation:
- Confirm that the lights automatically turn on at dusk. If they don’t, check the activation switch and battery connections.
Maintenance and Troubleshooting for Hampton Bay Solar Pathway Lights
Proper maintenance of your Hampton Bay solar pathway lights ensures they remain efficient and functional, while regular troubleshooting addresses any issues that may arise. By following these simple steps, you can enjoy long-lasting, bright, and eco-friendly lighting for your outdoor spaces.
Regular Maintenance
1. Clean Solar Panels
Keeping the solar panels clean is essential for maintaining their energy efficiency. Dirt, dust, or debris on the panels can reduce their ability to absorb sunlight effectively.
- Frequency: Clean the panels monthly, or more often in dusty or high-pollen areas.
- How to Clean:
- Use a soft, damp cloth to gently wipe the surface of the solar panel.
- For stubborn dirt, add a small amount of mild soap to the water. Avoid harsh chemicals or abrasive cleaners, as they can scratch or damage the panel.
2. Inspect Parts Regularly
Regularly inspecting your solar pathway lights helps identify potential issues before they become significant problems.
- Stakes:
- Check for rust or physical damage that could affect stability.
- Replace damaged stakes to ensure secure placement.
- Light Fixtures:
- Look for cracks, fading, or other signs of wear and tear on the fixtures.
- Tighten any loose screws or connections to keep the lights sturdy and functional.
- Batteries:
- Inspect the rechargeable batteries periodically to ensure they are holding a charge.
- Replace old or faulty batteries with compatible types (e.g., AA or AAA rechargeable batteries).
Troubleshooting Common Issues
1. Lights Not Turning On
- Causes:
- Switch not activated.
- Batteries not charged or faulty.
- Insufficient sunlight for charging.
- Solutions:
- Ensure the switch is in the “on” position.
- Replace batteries if they fail to hold a charge.
- Move the light to a sunnier location for improved charging.
2. Dim or Flickering Lights
- Causes:
- Dirty solar panels or depleted batteries.
- Loose connections in the fixture.
- Solutions:
- Clean the solar panels to improve efficiency.
- Check and replace batteries if needed.
- Tighten screws and connections to eliminate flickering.
3. Lights Not Staying in Place
- Causes:
- Damaged or unstable stakes.
- Solutions:
- Replace damaged stakes with new ones.
- Securely insert stakes into the ground and ensure the soil is firm around them.
Troubleshooting Common Issues with Hampton Bay Solar Pathway Lights
Even with proper installation and maintenance, you may encounter occasional issues with your Hampton Bay solar pathway lights. One of the most common problems is lights not working. Here’s a step-by-step guide to troubleshoot and resolve the issue effectively.
Lights Not Working: Common Causes and Solutions
1. Check the Switch
- Cause: The light may not be activated due to the switch being off or the pull tab not being removed.
- Solution:
- Ensure the switch is in the “ON” position.
- If the light is new, remove the pull tab from the battery compartment to activate it.
2. Ensure Proper Sunlight Exposure
- Cause: Insufficient sunlight can prevent the solar panel from charging the batteries fully.
- Solution:
- Clean the Solar Panel:
- Wipe the panel with a soft, damp cloth to remove dirt or debris that may block sunlight.
- Reposition the Light:
- Place the light in an area that receives at least 6+ hours of direct sunlight daily.
- Trim Overhanging Foliage:
- Remove any obstructions, such as branches or tall plants, that cast shadows on the panel.
- Clean the Solar Panel:
3. Check Battery Health
- Cause: Batteries can become depleted or lose their ability to hold a charge over time.
- Solution:
- Test the Batteries:
- Replace the batteries with new, compatible rechargeable batteries (e.g., AA or AAA, as specified by your model).
- Charge the Batteries:
- Allow the lights to charge in direct sunlight for a full day before testing.
- Test the Batteries:
4. Inspect Connections
- Cause: Loose wires or damaged connections can interrupt the flow of electricity.
- Solution:
- Open the battery compartment and inspect the connections.
- Ensure all wires are securely attached and free from damage.
- If wires are frayed or disconnected, repair or replace them as needed.
5. Check for Moisture
- Cause: Water ingress can damage internal components and prevent the light from functioning.
- Solution:
- Open the light fixture and inspect for moisture inside.
- Allow the interior to dry completely before reassembling.
- Consider applying a waterproof sealant around the seams to prevent future moisture issues.
Battery Replacement for Hampton Bay Solar Pathway Lights
Replacing the batteries in your Hampton Bay solar pathway lights is an essential maintenance step to ensure consistent performance. Over time, rechargeable batteries may lose their capacity to hold a charge, and replacing them will restore the light’s functionality. Here’s a step-by-step guide to safely and effectively replace the batteries in your solar lights.
Step-by-Step Guide to Replacing Batteries
1. Locate the Battery Compartment
- Most Hampton Bay solar pathway lights have the battery compartment located:
- Under the Solar Panel: Gently lift or unscrew the panel to access the compartment.
- At the Bottom of the Light Fixture: Flip the light over and look for a panel or cover.
2. Identify the Battery Type
- Check the existing battery to determine the correct type and size, usually:
- AA Rechargeable Batteries
- AAA Rechargeable Batteries
- Recommended Batteries:
- Use NiMH (Nickel-Metal Hydride) or NiCd (Nickel-Cadmium) rechargeable batteries, depending on your model.
- Avoid standard non-rechargeable batteries, as they can damage the solar light.
3. Replace the Batteries
- Remove the Old Batteries:
- Take out the old batteries carefully, noting their orientation (positive
+and negative-).
- Take out the old batteries carefully, noting their orientation (positive
- Insert New Batteries:
- Place the new batteries into the compartment, ensuring the correct polarity. The battery casing or compartment will typically indicate the correct orientation.
4. Close the Battery Compartment
- Securely close the compartment to protect the batteries and internal components from moisture and dirt.
- For compartments with screws, tighten them securely.
- Snap or seal the cover firmly if it uses a latch mechanism.
5. Charge the Batteries
- Place the solar light in a sunny location to allow the new batteries to charge fully.
- Ensure the solar panel receives at least 6+ hours of direct sunlight.
- Test the light after a full day of charging to confirm proper operation.
Tips for Prolonging Battery Life
- Clean the Solar Panel Regularly:
- Dust and debris can reduce sunlight absorption, affecting battery performance.
- Replace Batteries Annually:
- Rechargeable batteries typically last 1–2 years, depending on usage and environmental conditions.
- Store Properly in Winter:
- If not in use during colder months, remove the batteries and store them indoors to prevent damage.
Stake Replacement for Hampton Bay Solar Pathway Lights
Replacing broken or missing stakes for your Hampton Bay solar pathway lights is a simple and essential maintenance step to ensure stability and proper functionality. Damaged stakes can cause the light to tilt or fall, reducing its effectiveness and aesthetic appeal. Here’s how to replace a stake step-by-step.
Step-by-Step Guide to Stake Replacement
1. Remove the Old Stake
- Carefully detach the broken stake from the solar light fixture:
- For Detachable Stakes: Unscrew or pull the stake from the base of the light.
- For Stuck Pieces: Use pliers to gently remove any fragments lodged in the fixture.
2. Purchase a Replacement Stake
- Where to Buy:
- Visit Home Depot, the primary retailer for Hampton Bay products, to find compatible replacement stakes.
- Check online marketplaces like Amazon or specialty parts retailers for universal or model-specific stakes.
- What to Look For:
- Ensure the replacement stake matches the diameter and connection type of your light fixture.
- Opt for sturdy materials like durable plastic or metal for longer-lasting support.
3. Install the New Stake
- Insert the replacement stake firmly into the base of the solar light fixture.
- Align the connection points to ensure a secure fit.
- Push the stake into the ground, ensuring it is straight and stable.
- Level the Fixture:
- Adjust the light so it sits level and upright.
- If the ground is uneven, use a small shovel or trowel to smooth the area before inserting the stake.
Tips for a Secure Installation
- Avoid Hammering: Press the stake into the ground by hand to prevent damage.
- Test Stability: Gently wiggle the fixture to confirm it is secure before completing installation.
- Use Ground Enhancements: For added stability, consider placing mulch, gravel, or soil around the base of the stake.
Replacement Parts and Accessories for Hampton Bay Solar Pathway Lights
Maintaining your Hampton Bay solar pathway lights often requires replacing parts to ensure their functionality and longevity. Among the most common replacement parts are rechargeable batteries, which power the lights during nighttime hours. Understanding the types of batteries required and the replacement process is essential for keeping your solar lights in top condition.
Replacement Batteries for Hampton Bay Solar Pathway Lights
Rechargeable batteries are a critical component of Hampton Bay solar pathway lights. They store the energy collected by the solar panel during the day and power the light at night. Over time, these batteries may lose their ability to hold a charge, necessitating a replacement.
Types of Replacement Batteries
- AA NiMH (Nickel-Metal Hydride): The most common type of battery used in solar pathway lights.
- AAA NiMH: Occasionally used for smaller or more compact light models.
- Capacity Rating: Check the battery’s mAh (milliampere-hour) rating to ensure it matches your light’s requirements. A higher mAh rating provides longer-lasting power.
How to Replace the Batteries
Replacing the batteries in Hampton Bay solar pathway lights is a simple process. Follow these steps:
- Locate the Battery Compartment:
- The battery compartment is typically located:
- Under the Solar Panel: Gently lift or unscrew the panel to access the compartment.
- At the Base of the Light: Flip the fixture to find a compartment door.
- The battery compartment is typically located:
- Open the Compartment:
- Use a screwdriver if necessary to remove screws securing the compartment cover.
- Handle the screws carefully to avoid losing them during the replacement process.
- Remove the Old Batteries:
- Take note of the battery orientation (positive
+and negative-terminals) before removing the old batteries. - Dispose of the used batteries properly at a designated recycling center.
- Take note of the battery orientation (positive
- Insert the New Batteries:
- Place the new rechargeable batteries in the compartment, ensuring the correct alignment of terminals.
- Use the same type and capacity as recommended by the manufacturer.
- Secure the Compartment:
- Replace the cover and tighten any screws to seal the battery compartment.
- Ensure the compartment is fully closed to prevent moisture or dirt from entering.
- Charge Before Use:
- Place the solar light in direct sunlight for a full day to charge the new batteries before testing.
Tips for Optimal Battery Performance
- Clean the Solar Panel Regularly:
- Dust or debris can reduce charging efficiency. Wipe the panel with a soft, damp cloth monthly.
- Replace Annually or As Needed:
- Depending on usage, rechargeable batteries typically last 1–2 years.
- Avoid Non-Rechargeable Batteries:
- Using standard batteries can damage the light and void the warranty.
Light Bulb Replacement and Extension Cord Usage for Hampton Bay Solar Pathway Lights
Maintaining your Hampton Bay solar pathway lights involves addressing common issues like bulb replacements and enhancing functionality with accessories like extension cords. Here’s how to manage these tasks effectively.
Light Bulb Replacement for Hampton Bay Solar Lights
Hampton Bay solar lights primarily use energy-efficient LED bulbs, but older models may include replaceable bulbs. Proper replacement ensures your lights maintain optimal performance.
1. LED Lights
- Long Lifespan:
- Most Hampton Bay solar pathway lights feature integrated LED bulbs designed to last for thousands of hours.
- LED bulbs rarely require replacement, making them a low-maintenance solution.
- Replacement:
- If an integrated LED bulb is damaged or stops working, the entire fixture may need to be replaced.
- Check with Hampton Bay customer service or the retailer for warranty options and replacement fixtures.
2. Other Bulb Types
- Older Models:
- Some older Hampton Bay solar lights may have replaceable bulb sockets.
- Steps for Replacement:
- Check the Manual: Refer to the product manual to confirm if the bulb is replaceable and the type required.
- Remove the Bulb: Unscrew or pull out the damaged bulb carefully.
- Insert the New Bulb: Use a bulb of the same type and wattage specified for your model.
- Contact Support: If the manual is unavailable, contact Hampton Bay customer service to verify the bulb specifications.
Hampton Bay Solar Light Extension Cord
An extension cord can add flexibility to your Hampton Bay solar lights by allowing you to separate the solar panel from the light fixture. This is particularly useful for shaded areas where the panel cannot receive sufficient sunlight.
1. Purpose of an Extension Cord
- Extend Placement Flexibility:
- Use an extension cord to position the solar panel in a sunny location while keeping the light fixture in a shaded or covered area.
- Improve Charging Efficiency:
- Ensures the solar panel receives maximum sunlight, enabling the light to perform optimally.
2. Compatibility
- Model-Specific Cords:
- Check the compatibility of the extension cord with your specific Hampton Bay solar light model.
- Use cords recommended by Hampton Bay or verified third-party options.
3. How to Use
- Connect the Cord:
- Attach the extension cord securely between the solar panel and the fixture, ensuring proper alignment of the connectors.
- Position the Panel:
- Place the panel in an area with at least 6+ hours of direct sunlight daily.
- Secure the Cord:
- Use clips or outdoor-rated tape to keep the cord in place and prevent tripping hazards.
Adding Accessories to Hampton Bay Solar Pathway Lights
Enhancing your outdoor lighting setup with accessories and specific product options like light kits and premium models can elevate the functionality and aesthetics of your space. Hampton Bay offers versatile solutions, including multi-pack options and stylish designs like the Jefferson solar path lights.
Light Kits: Convenient Options for Any Outdoor Space
Hampton Bay solar pathway light kits are a cost-effective and convenient way to light up your pathways, gardens, or driveways. Available in multiple pack sizes, these kits cater to various outdoor lighting needs.
1. Available Options
- Hampton Bay Solar Pathway Lights 6-Pack:
- Ideal for longer pathways or extensive outdoor setups.
- Provides ample lighting for creating a continuous and cohesive illumination.
- Hampton Bay Solar Pathway Lights 4-Pack:
- Perfect for smaller paths, garden accents, or highlighting specific areas.
- A practical option for compact spaces or decorative enhancements.
2. Where to Buy
- Availability:
- Find these light kits on the Home Depot website or at Home Depot stores.
- Frequently available at discounted prices, making them an economical choice for larger projects.
3. Benefits of Light Kits
- Streamlined purchase process with pre-packaged sets.
- Matching designs ensure a consistent aesthetic across your outdoor space.
- Easy installation without requiring additional tools or materials.
Jefferson Solar Path Lights: Style and Functionality Combined
The Hampton Bay Jefferson solar path lights are a popular choice for homeowners seeking a blend of classic style and reliable performance. These lights offer unique features that enhance both the look and usability of your outdoor space.
1. Features
- Classic Lantern-Style Design:
- Timeless and elegant, the lantern-style design complements a variety of outdoor decor themes.
- Warm White LEDs:
- Emit a soft, welcoming glow that creates a cozy ambiance along pathways or garden beds.
- Durable Construction:
- Made with a combination of sturdy metal and high-quality plastic, these lights are built to withstand outdoor elements.
- Easy Installation:
- No wiring is required, allowing for quick and hassle-free setup.
2. Benefits of Jefferson Solar Path Lights
- Enhance curb appeal with a stylish and functional lighting solution.
- Long-lasting materials ensure the lights remain a reliable feature in your outdoor space.
- Warm lighting adds charm and safety to walkways, driveways, and garden paths.
Replacement Parts for Hampton Bay Solar Pathway Lights
To maintain the functionality and aesthetic appeal of your Hampton Bay solar pathway lights, replacing worn or damaged parts is crucial. Hampton Bay offers a variety of replacement components to ensure your lights continue to provide reliable illumination and enhance your outdoor spaces. Here’s an overview of the most commonly available replacement parts.
1. Hampton Bay Solar Light Replacement Stakes
- Purpose:
- Replacement stakes are essential for securely anchoring your solar lights into the ground. These are ideal for fixing damaged or missing stakes due to wear and tear or outdoor conditions.
- Availability:
- Replacement stakes can be purchased from Home Depot stores or their online platform.
- Ensure compatibility by checking your light’s model number before purchasing.
- Benefits:
- Restore stability and proper alignment for your solar pathway lights.
- Prevent tilting or falling that can reduce lighting efficiency.
2. Hampton Bay Solar Light Batteries
- Purpose:
- Rechargeable batteries power Hampton Bay solar lights, storing energy collected by the solar panel during the day.
- Over time, these batteries may lose their capacity to hold a charge and require replacement.
- Types of Batteries:
- Most models use AA or AAA NiMH rechargeable batteries.
- Check the battery compartment or product manual for specific battery requirements.
- Where to Buy:
- Hampton Bay solar light batteries are available at Home Depot, online retailers like Amazon, and specialty stores.
- Benefits:
- Ensures consistent nighttime illumination.
- Improves energy efficiency by maintaining optimal charging and discharging cycles.
3. Hampton Bay Solar Light Bulb Replacement
- Purpose:
- Some older Hampton Bay solar lights or specialty models feature replaceable bulbs. Modern LED-integrated designs typically do not have replaceable bulbs and require replacing the entire fixture if the bulb fails.
- How to Check:
- Refer to the product manual or contact Hampton Bay customer support to determine if your model includes replaceable bulbs.
- Availability:
- Replacement bulbs can be sourced through Home Depot or verified third-party retailers.
- Benefits:
- Keeps your solar lights functional without needing a complete fixture replacement.
Cost and Reviews of Hampton Bay Solar Pathway Lights
Hampton Bay solar pathway lights are a popular choice for outdoor lighting, offering an eco-friendly and affordable solution for illuminating pathways, gardens, and driveways. Understanding the cost and customer reviews can help you make an informed decision when considering these lights for your outdoor spaces.
Cost of Hampton Bay Solar Pathway Lights
Hampton Bay solar pathway lights are available in various price ranges and pack sizes to suit different needs and budgets. Here’s a breakdown:
1. Price Range
- Individual Lights: Priced between $10 and $30 per light, depending on design, size, and features.
- Multi-Packs:
- 4-Pack: Typically ranges from $25 to $50, ideal for smaller pathways or accent lighting.
- 6-Pack: Offers better value, priced between $40 and $80, suitable for longer pathways or extensive setups.
2. Where to Buy
- Home Depot:
- The primary retailer for Hampton Bay solar pathway lights.
- Offers the widest selection, including the latest models and multi-pack options.
- Amazon:
- Competitive prices with a variety of styles.
- Convenient for online shopping and often includes customer reviews for reference.
- Walmart:
- Limited selection but occasionally offers competitive pricing on specific models.
- Other Retailers:
- Hampton Bay solar lights may be available at local hardware stores or specialty lighting shops, though availability can vary.
Reviews of Hampton Bay Solar Pathway Lights
Customer feedback on Hampton Bay solar pathway lights highlights their strengths and areas for improvement. Here’s a summary of common sentiments:
1. Positive Feedback
- Easy Installation:
- Customers appreciate the no-wiring setup, which allows for quick and hassle-free installation.
- Brightness:
- Adequate for lighting pathways, gardens, and driveways, providing a safe and inviting ambiance.
- Value for Money:
- Multi-pack options offer great affordability compared to other brands, making them a budget-friendly choice.
- Design Variety:
- Available in various styles, from modern to classic, allowing buyers to match their outdoor decor.
2. Negative Feedback
- Durability:
- Some customers report issues with plastic components, particularly stakes that may break over time.
- Battery Life:
- Batteries may drain faster during winter months due to reduced sunlight and colder temperatures.
- Brightness Consistency:
- Occasional variability in brightness, with some lights appearing dimmer than others.
3. Overall Impressions
- Popularity:
- Hampton Bay solar pathway lights are highly regarded for their ease of use, affordability, and design variety. Customers appreciate the charm of Hampton Bay’s vintage-style filament bulbs, noting how they enhance outdoor decor while operating on low voltage, eco-friendly solar energy
- Considerations:
- When purchasing, review local weather conditions and plan for occasional maintenance, such as replacing stakes or batteries.
Instructions and Safety Tips for Hampton Bay Solar Pathway Lights
Hampton Bay solar pathway lights are an eco-friendly and efficient way to illuminate outdoor spaces, but proper usage and adherence to safety guidelines are essential for optimal performance and longevity. Here’s a detailed guide to help you use the lights effectively while ensuring safety during installation and maintenance.
Using the Lights: Proper Usage Instructions
Follow these instructions to maximize the functionality and lifespan of your Hampton Bay solar pathway lights:
1. Charge Fully Before First Use
- Place the lights in an area with 6–8 hours of direct sunlight to ensure the battery is fully charged before initial operation.
- Charging the lights fully ensures they perform optimally from the start.
2. Turn the Lights On
- For lights with a switch, move it to the “ON” position to activate the solar charging and lighting functionality.
- If the light has a pull tab in the battery compartment, remove it to allow the battery to connect.
3. Optimal Placement
- Install the lights in locations that receive maximum sunlight exposure during the day.
- Avoid shaded areas caused by trees, buildings, or other obstructions, as this will reduce charging efficiency.
4. Winter Usage
- Solar lights may have reduced performance during winter due to shorter daylight hours and lower sunlight intensity.
- Consider relocating the lights to sunnier spots or supplementing with additional lighting during this period.
Safety Considerations for Installation and Maintenance
Proper installation and regular maintenance help ensure your Hampton Bay solar pathway lights remain safe and functional.
1. Secure Placement
- Insert the stakes firmly into the ground to prevent the lights from tipping over or becoming loose.
- Avoid hammering the stakes, as this could damage the fixture or stake.
2. Clear Obstructions
- Keep solar panels clean and free from dirt, debris, or snow to maximize sunlight absorption.
- Regularly check for overhanging branches or other obstructions that might cast shadows on the solar panels.
3. Water Resistance
- Hampton Bay solar lights are designed to withstand light rain and moisture, but they should not be submerged in water.
- Inspect seals and casings to ensure water cannot enter the fixture, especially after heavy rainfall.
4. Battery Handling
- Use compatible rechargeable batteries (e.g., AA or AAA NiMH) as specified in the product manual.
- Dispose of old batteries responsibly by recycling them at designated collection points to prevent environmental harm.
5. Electrical Safety
- Do not tamper with the internal wiring or components of the solar light.
- If you encounter issues that cannot be resolved through basic troubleshooting, contact Hampton Bay customer support or consult a professional.
Additional Tips for Longevity and Safety
- Store Lights Properly During Off-Seasons: If you plan to store the lights during winter, remove the batteries and keep them in a dry, indoor location.
- Follow Manufacturer Instructions: Always consult the product manual for specific guidance on installation, maintenance, and troubleshooting.
- Avoid Chemical Exposure: Do not use harsh cleaners or solvents on the solar panel or fixture to prevent damage.
Conclusion
Hampton Bay solar pathway lights are a stylish, eco-friendly solution for illuminating your outdoor spaces. By following the proper installation and maintenance steps, you can ensure these lights remain functional, efficient, and visually appealing for years to come.
Recap: Key Steps for Installation and Maintenance
- Installation:
- Choose a sunny location with 6+ hours of sunlight daily for optimal charging.
- Assemble the lights, secure the stakes firmly into the ground, and position the solar panels toward the sun.
- Activate the lights by removing the pull tab or switching them to “ON.”
- Maintenance:
- Clean the solar panels regularly to maximize energy absorption.
- Inspect and replace rechargeable batteries as needed to ensure consistent performance.
- Check for loose stakes or damaged components and address them promptly.
- Troubleshooting:
- Address common issues like lights not working by checking the switch, battery health, and sunlight exposure.
- Resolve flickering or dim lights by cleaning panels, tightening connections, or replacing components.
Embrace Eco-Friendly Lighting
Hampton Bay solar pathway lights provide a sustainable and cost-effective way to light your outdoor spaces. By harnessing solar power, these lights reduce electricity usage, lower energy bills, and minimize environmental impact—all while enhancing the safety and beauty of your pathways and gardens.
Share Your Experiences and Questions
We’d love to hear about your experience with Hampton Bay solar pathway lights! Share your thoughts, tips, or questions in the comments section below. Whether you’re looking for advice or want to share your success story, we’re here to assist and celebrate your eco-friendly lighting journey.